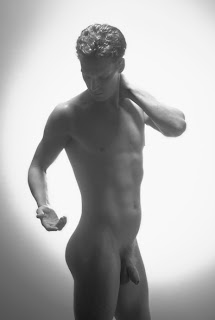
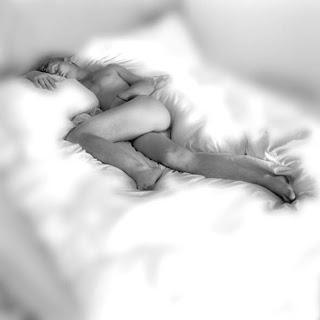
Homoerotic art by the American digital artist Mike /last name I do not know/. Nude men and sex, sex, sex ...
Website: http://www.mikemen.com/
|
|
---|
|
|
---|
Monday, August 30, 2010
Erotic Digital Art. Mikemen.
Thursday, August 26, 2010
Art-works by Geoffrey Laurence.
Male characters in works by American artist Geoffrey Laurence /long lived in England and Mexico/. Realistic painting and drawing.
Oscar. Oil on canvas. 36" X 26"
Same as it Ever Was. Oil on canvas. 44" X 37"
Steven Steven. Oil on canvas. 28" X 24"
The Strongman. Oil on canvas. 72" X 36"
The Big A. Charcoal on paper. 72" X 48"
Study for the Strongman. Charcoal on paper. 38" X 24"
Website: http://www.geoffreylaurence.com/
Oscar. Oil on canvas. 36" X 26"
Same as it Ever Was. Oil on canvas. 44" X 37"
Steven Steven. Oil on canvas. 28" X 24"
The Strongman. Oil on canvas. 72" X 36"
The Big A. Charcoal on paper. 72" X 48"
Study for the Strongman. Charcoal on paper. 38" X 24"
Website: http://www.geoffreylaurence.com/
Wednesday, August 25, 2010
Simplex Photography 2 - template for photographer
Several days ago ,Stephen Liau asked me for a template which show full gallery in the homepage and show like blog post for each image in gallery. And I answered him I was making template Simplex Photography2 . Now is the time for Simplex Photography 2 . Please take a look .
Live Demo | Download
Do you like it? ^^
2,Open template file in any word editor you have ( I recommend Notepad++ )
3,To change header to your logo or banner ,find this code :
<div class="logo">
<a expr:href='data:blog.homepageUrl'><img src="your_logo"/></a>
</div><!-- logo //-->
4,Change the link to categories in Category menu , find this code :
<div class="rp_list" id="cat_list">
<a href="http://simplexphotography2.blogspot.com/"><h3>Home</h3></a>
<a href="http://simplexphotography2.blogspot.com/search/label/human"><h3>Human</h3></a>
<a href="http://simplexphotography2.blogspot.com/search/label/nature"><h3>Nature</h3></a>
<a href="http://simplexphotography2.blogspot.com/search/label/test"><h3>Test</h3></a>
</div>
Change the link and text in bold to your category name and link .Link to each category has structure :
http://your blog name.blogspot.com/search/label/category name
You can add more or remove links as your need .
5,To change the ad banner ,find this code :
<li class="widget1">
<a href="http://simplexdesign.blogspot.com"><img src="http://img30.imageshack.us/img30/3598/120x600ads.jpg"/></a>
</li>
and change the code in bold to your ad code . If you want to add code of ad network such as Adsense or Adbrite ...,you have to encode it first ,by copying the code Ad network provide ,then go to http://centricle.com/tools/html-entities/ ,paste it in text box ,click on encode ,and copy the result to template file to replace the text in bold above.
6,Save template and upload it to Blogger .
After that ,create a post as normal .Each post should contain one image and text for description . When you finish creating content for the post ,click on edit HTML ,find <img src="........." /> tag of your image and change it to :
<img alt="link to original image" src="link to thumbnail" />
So the structure for a post should be like this :
<img alt="link to original image" src="link to thumbnail" />
text for description
Original image should be at least 1024x768 px and size for thumbnail is fixed at 180x120 px
That's all ,and you can publish your post .
I hope you like this template . Feel free to leave me feedback via comments ^^ Thanks for supporting me.
Live Demo | Download
Do you like it? ^^
To install this template ,please follow these steps
1,Download this template (of course :)2,Open template file in any word editor you have ( I recommend Notepad++ )
3,To change header to your logo or banner ,find this code :
<div class="logo">
<h1><a expr:href='data:blog.homepageUrl'>Simplex PhotoGallery2</a></h1>
</div><!-- logo //-->
and change the code in bold to yours banner or logo ,for example :<div class="logo">
<a expr:href='data:blog.homepageUrl'><img src="your_logo"/></a>
</div><!-- logo //-->
4,Change the link to categories in Category menu , find this code :
<div class="rp_list" id="cat_list">
<a href="http://simplexphotography2.blogspot.com/"><h3>Home</h3></a>
<a href="http://simplexphotography2.blogspot.com/search/label/human"><h3>Human</h3></a>
<a href="http://simplexphotography2.blogspot.com/search/label/nature"><h3>Nature</h3></a>
<a href="http://simplexphotography2.blogspot.com/search/label/test"><h3>Test</h3></a>
</div>
Change the link and text in bold to your category name and link .Link to each category has structure :
http://your blog name.blogspot.com/search/label/category name
You can add more or remove links as your need .
5,To change the ad banner ,find this code :
<li class="widget1">
<a href="http://simplexdesign.blogspot.com"><img src="http://img30.imageshack.us/img30/3598/120x600ads.jpg"/></a>
</li>
and change the code in bold to your ad code . If you want to add code of ad network such as Adsense or Adbrite ...,you have to encode it first ,by copying the code Ad network provide ,then go to http://centricle.com/tools/html-entities/ ,paste it in text box ,click on encode ,and copy the result to template file to replace the text in bold above.
6,Save template and upload it to Blogger .
How to use this template ?
To make a post ,first of all ,you need to create thumbnail for each of your images ,many free softwares available in internet for creating thumbnail and I think you can easily search for them ( I use Yet Another Thumbnail Creator ) .Upload original image and thumbnail to a host or image hosting service .After that ,create a post as normal .Each post should contain one image and text for description . When you finish creating content for the post ,click on edit HTML ,find <img src="........." /> tag of your image and change it to :
<img alt="link to original image" src="link to thumbnail" />
So the structure for a post should be like this :
<img alt="link to original image" src="link to thumbnail" />
text for description
Original image should be at least 1024x768 px and size for thumbnail is fixed at 180x120 px
That's all ,and you can publish your post .
I hope you like this template . Feel free to leave me feedback via comments ^^ Thanks for supporting me.
Tuesday, August 24, 2010
Lightbox - really working script
Many people asked me how to make lightbox effect for Blogger ,they used many script but none of them work well in Blogger . I also tried so many ways and I found the script which is provided in Bloggerplugins.org really work . So I think it would be helpful if I show the script and steps here . For the full article ,you can refer to here
For the demo ,check this page on my template Simplex Newspaper II
Here is steps for making this effect :
1,Login to Blogger ,go to Dashboard ,continue to Design ,then to Edit HTML
2,Find this code :
</head>
3,Insert this script before </head>
<style>
#lightbox{ position: absolute; left: 0; width: 100%; z-index: 100; text-align: center; line-height: 0;}
#lightbox img{ width: auto; height: auto;}
#lightbox a img{ border: none; }
#outerImageContainer{ position: relative; background-color: #fff; width: 250px; height: 250px; margin: 0 auto; }
#imageContainer{ padding: 10px; }
#loading{ position: absolute; top: 40%; left: 0%; height: 25%; width: 100%; text-align: center; line-height: 0; }
#hoverNav{ position: absolute; top: 0; left: 0; height: 100%; width: 100%; z-index: 10; }
#imageContainer>#hoverNav{ left: 0;}
#hoverNav a{ outline: none;}
#prevLink, #nextLink{ width: 49%; height: 100%; background-image: url(data:image/gif;base64,AAAA); /* Trick IE into showing hover */ display: block; }
#prevLink { left: 0; float: left;}
#nextLink { right: 0; float: right;}
#prevLink:hover, #prevLink:visited:hover { background: url(https://blogger.googleusercontent.com/img/b/R29vZ2xl/AVvXsEglWCDV_-OqZ1NCHsEa_q8vp1LePq7gUCX6PkMgsmdru6Y5w19qg-e_SCNhUa_vxAYDkkWZ_OSK8KeZ5tehTk5uXxHdG2MSc6eXZTEq8h7WJrV_3RQ__D0rYJznjBDfKiWq9ukPRYKdjfk/) left 15% no-repeat; }
#nextLink:hover, #nextLink:visited:hover { background: url(https://blogger.googleusercontent.com/img/b/R29vZ2xl/AVvXsEiqSOUhCOfbOOLuUtGdXTm3CcAIhZOC_FBbCTfmqU3XJgpKzAPZl3mfDnObmMRK-XRBcbcNH7fk_LdLev18h8gsli85NkA3KtM7cXygl83c28uik2VNMHDvKbXcnM_4DktsusFj-T1uhDM/) right 15% no-repeat; }
#imageDataContainer{ font: 10px Verdana, Helvetica, sans-serif; background-color: #fff; margin: 0 auto; line-height: 1.4em; overflow: auto; width: 100% ; }
#imageData{ padding:0 10px; color: #666; }
#imageData #imageDetails{ width: 70%; float: left; text-align: left; }
#imageData #caption{ font-weight: bold; }
#imageData #numberDisplay{ display: block; clear: left; padding-bottom: 1.0em; }
#imageData #bottomNavClose{ width: 66px; float: right; padding-bottom: 0.7em; outline: none;}
#overlay{ position: absolute; top: 0; left: 0; z-index: 90; width: 100%; height: 500px; background-color: #000; }
round-color: #000; }
lute; top: 0; left: 0; z-index: 90; width: 100%; height: 500px; background-color: #000; }
round-color: #000; }
</style>
<script src='http://ajax.googleapis.com/ajax/libs/prototype/1.6.0.2/prototype.js' type='text/javascript'/>
<script src='http://files.bloggerplugins.org/lbox/js/scriptaculous.js' type='text/javascript'/>
<script src='http://blogergadgets.googlecode.com/files/lightbox.js' type='text/javascript'/>
Save template .
4,To use Lightbox effect in your post ,when editing post ,click on Edit HTML .
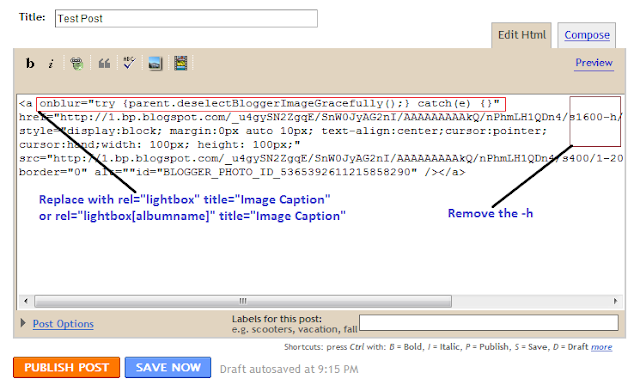
To add lightbox effect for one image ,just use rel="lightbox" title="Your image Caption" as picture above
To add lightbox effect for multiple images , use rel="lightbox[albumname]" title="Your Image Caption"
if you want to add another image to this album,upload the second image and use rel="lightbox[albumname]" title="Caption for Second image of albumname"
in this case , lightbox will work like a gallery with next and previous links and you can use keyboard to navigate through the album
That's all for Lightbox effect . I hope it work for you .
Feel free to leave me feedback ^^
---------------------------------------------------------------
This post is supported by Managed Hosting
Erotic photo-art. Anthony Boccaccio.
Art-works of Italian photographer Anthony Boccaccio. Erotic black-and-white photos of beautiful nude men.
Website: http://www.boccacciophoto.com/
Monday, August 23, 2010
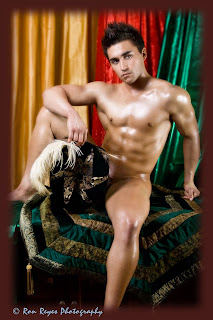
Erotic photo-art. Ron Reyes.
Art-works of the American photographer and graphic designer Ron Reyes. Bright colorful photos of nude male models.
Website: http://www.ronreyesphotography.com/
Friday, August 20, 2010
Simplex Enews F.A.Q
Simplex Enews is one of the most popular templates of mine . I received many comments on for errors and solutions . Thanks for your kindly comment and I think it's the time to make a F.A.Q (Frequently Asking Question) .This post will cover some troubles we met when using this template .I hope it will be helpful to you when stick with Simplex Enews .
1,Why my blog is messed /or showing blank / elements are not in right place... after install this template?Please fill all categories with posts and you will find out everythings is ok , at least 4 posts for each label and it will work well ^^
-Open template in word editor ,find '.pagenavi' and it will lead you to CSS code of page navigation bar ,add these attribute : text-align:center;clear:both;
-Find <div class='pagenavi' id='blog-pager'> and delete id='blog-pager' to <div class='pagenavi'>
Or you can download fixed version .Link to download included in the install instruction .
you can go to this page http://www.facebook.com/facebook-widgets/share.php
copy the code of Facebook share button .After that ,find this code :<data:post.body/> and paste the code of FB share button before this code . Visit here if you want the code for tweetmeme : http://help.tweetmeme.com/2009/04/06/tweetmeme-button/
About related posts ,I have two posts on this topic ,one for related post without image, and the other with image .Pls search .
In 108 comments at this time for template Simplex Enews , Here are the troubles we met . Feel free to comment for new errors or suggestion .Thanks all for supporting me .
1,Why my blog is messed /or showing blank / elements are not in right place... after install this template?
2,There's no navigation bar in my blog ?
if you don't see page navigation bar in bottom of category page (Newer posts,older posts,home) ... You can :-Open template in word editor ,find '.pagenavi' and it will lead you to CSS code of page navigation bar ,add these attribute : text-align:center;clear:both;
-Find <div class='pagenavi' id='blog-pager'> and delete id='blog-pager' to <div class='pagenavi'>
Or you can download fixed version .Link to download included in the install instruction .
3,I see no image in home page .It's only 'no image' picture
You can switch your feed mode to Full feed instead of Short .Go to Dashboard ->Setting ->Site Feed -> Allow Blog Feed -> Change to Full4,My breaking news show strange characters instead of news ?
Just fill Breaking news category with at least 4 posts .5,How can I change the number of posts in category ?
To change number of post for label from 1 to 6 ,change numposts = 4; to numposts = 3; .Label10 and label8 ,can't change the number of posts by changing value of variables ,so please give me your email and I will send a changed version to yours6,How can I insert FB share / Tweetmeme / Social bookmark buttons /Related posts/ in the end of posts ?
find <data:post.body/> . Copy the code of Tweetmeme and FBshare and paste bellow <data:post.body/> .you can go to this page http://www.facebook.com/facebook-widgets/share.php
copy the code of Facebook share button .After that ,find this code :<data:post.body/> and paste the code of FB share button before this code . Visit here if you want the code for tweetmeme : http://help.tweetmeme.com/2009/04/06/tweetmeme-button/
About related posts ,I have two posts on this topic ,one for related post without image, and the other with image .Pls search .
In 108 comments at this time for template Simplex Enews , Here are the troubles we met . Feel free to comment for new errors or suggestion .Thanks all for supporting me .
Thursday, August 19, 2010
Erotic painting. Weng Ziyang.
Art-works of the Chinese artist Weng Ziyang. Not nude models, but very interesting male characters.
Website: http://wengziyang1999.cgsociety.org/
Tuesday, August 17, 2010
Erotic photo-art. Robert John Guttke.
Art-works by American artist, sculptor and photographer Robert John Guttke. Very sexy black-and-white photos of nude male models.
Website: http://www.guttke-arts.com/
Monday, August 16, 2010
Simplex Gallery F.A.Q
Yesterday ,when I checked comments in blog ,I found that many of them are duplicated or ask for the same troubles .So I decided to make F.A.Q (frequently asking question ) for all of my templates .I know it's too late to make FAQ ,but I think it's better than reading many comments. Let's start with Simplex Gallery first .
it's the picture I captured a part of my template sourcecode .
in this picture ,I marked where link and text for categories located by arrows . All the links for category are in tag layout div class="headerright" . You first find "div" tag with class="headerright" and it's where you need to change for your categories in my template
<link href=''favicon_url' rel='shortcut icon'/>
In this post ,I listed 14 popular troubles frequently asked on Simplex Gallery template . I hope it will reduce your time and effort .
FAQ for other templates will be publish soon . Thankx for support me .
1,How to edit category
check this image : http://lh6.ggpht.com/_MsaNQZtvB5E/SszFfJr5IYI/AAAAAAAAAJY/lZDzuhyKeFo/s144/Noname.jpgit's the picture I captured a part of my template sourcecode .
in this picture ,I marked where link and text for categories located by arrows . All the links for category are in tag layout div class="headerright" . You first find "div" tag with class="headerright" and it's where you need to change for your categories in my template
2,My images are distorted . How can I do to make it show as original (keeping proportion )
because I set a fixed width and height is 700x438 px ,so your image will be resized to this proportion ,and make your image are distorted . To keep image as original proportion ,you can do some steps bellow :
open template file in a word editor. press Ctr+F to find this term "#main_image img " ( not included brackets ) . This is CSS tag control image appearance . Find attribute : height and width and change this to max-height and max-width .
We change height and width to max-height and max-with mean instead of assigning a fixed size 700x438 px for images ,we assign the maximum value for both of width and height . If your image width is over the maximum value , the width is forced to maximum number and height will be calculated for keeping its original proportion .The same if height is over maximum value . In case of your image size is not over both of width and height ,it will be keep as original .
3,I want to insert more than one pics in a post . Is it possible ?
I made this template for personal gallery ,it mean a gallery for photographers show their artwork for days ,so I think one image in a post is enough . In addition , I created this template base on javascript and it can process one image in a post for showing as you see . If you want to add more pics ,you can see my other templates .
4,How about adsense ?
you can add adsense code in anywhere you like . Some people who are using this template did this and it work properly . But Adsense Code need to be encode before insert in template file . To encode Adsense Code,you can copy your code ,go to http://centricle.com/tools/html-entities/ ,paste your code and click encode . Copy the result and paste to template . It maybe occur error if your Adsense code is not encoded .
5,How about SEO ?
if you want to SEO ,you can add meta tags at the beginning of this template file . Do as SEO other template .
Each image in this template is showed with it title (text in the fold between image and thumbnal) for optimizing in Google image ,so you don't need to do more for SEO in Google image .
If you want more ,you can spend your time to tweak this template and modify it as you want . I hope you will find the best result for yourself .
6,I want to set height and width of image my own
you can find two lines in template file :
#main_image{margin:0 auto 60px auto;height:438px;width:700px;background:black;}
#main_image img{margin-bottom:10px;max-height:438px;max-width:700px;}
and change width ,height attribute for your need .
#main_image{margin:0 auto 60px auto;height:438px;width:700px;background:black;}
#main_image img{margin-bottom:10px;max-height:438px;max-width:700px;}
and change width ,height attribute for your need .
7,I have bought a custom domain using your template and the thumbnails now are aligned vertically and in a mess. It was ok at first. Does the html change when I change it to a custom domain?
take a look at this picture : http://lh3.ggpht.com/_MsaNQZtvB5E/SwAodRhtKXI/AAAAAAAAAds/Zn7cNRN3Jt0/s800/brandon.png
Is this what you need ?
When changing code ,I think you missed some CSS property ,and it's the reason why thumbnails are showed in vertical .
To fix this problem ,just add this code to CSS section of your template :
.galleria li {
display:block;
float:left;
height:80px;
margin:0 10px 10px 0;
overflow:hidden;
width:80px;
}
And everything will be okay .
8,I want to add my own logo
here is the code of header left :
<div class='headerleft'>
<div class='headertext'>
............
</div>
</div>
you can add your own logo by adding an img tag right after <div class='headertext'> . Like this :
<div class='headerleft'>
<div class='headertext'>
<img src="your image url" title="..." width="" height="" />
............
</div>
</div>
<div class='headerleft'>
<div class='headertext'>
............
</div>
</div>
you can add your own logo by adding an img tag right after <div class='headertext'> . Like this :
<div class='headerleft'>
<div class='headertext'>
<img src="your image url" title="..." width="" height="" />
............
</div>
</div>
9,I have trouble with Google Chrome .The first image disappeared after loading
I really don't know why this doesn't work properly in Chrome .I tested this template in other browsers and it work quite well . Error is only occurred in Chrome .May be Javascript of this code is not working good with Chrome Javascript engine .In the later versions of Chrome ,it works well ,but not with older .
10,How can I add caption to image ?
to add caption for picture ,you just add title attribute for img tag .
You can edit your post as the structure I mentioned :
<img src="your image url" title="title of your image - required" />
11,My images are resized or loading error when using Blogger image uploader
When you upload image using Blogger ,it will resize your image automatically.
For example ,I see an image link in your blog :
https://blogger.googleusercontent.com/img/b/R29vZ2xl/AVvXsEhX8L1IDCwEDGT9_s68ZPnjDb_VZheglNl8HVQeMUJhR3Sz8yyhNbUguL1GoRyUyBF-FnVyYGZeetShkeM14GWRgirNLoPDg8M1EN4prD8gFSBIQK__fTW6UH8Imttp0LOdI7E-Y7XCaAw/s400/_DSC6323.jpg
Do you see /s400/ in the link ? it mean the image is resized to maximum of each dimension only 400px .
If you want to fix the trouble ,you can delete /s400/ in the link ,to this one
https://blogger.googleusercontent.com/img/b/R29vZ2xl/AVvXsEhX8L1IDCwEDGT9_s68ZPnjDb_VZheglNl8HVQeMUJhR3Sz8yyhNbUguL1GoRyUyBF-FnVyYGZeetShkeM14GWRgirNLoPDg8M1EN4prD8gFSBIQK__fTW6UH8Imttp0LOdI7E-Y7XCaAw/
This is actual URL of your image when upload to Blogger.
12,How can I change the number of thumbnail
You can change the number of thumbnails by changing the number of post per page .Just go to Dashboard ->Settings->Formatting ,change the number in Show to number you want .That's all .13,I want a favicon
upload your image which will be used as favicon to an image hosting ,such as photobucket . open template file and paste this line after ]]></b:skin><link href=''favicon_url' rel='shortcut icon'/>
14,I want a contact page
Because this template is the first I made ,so it lack of feature . But you can see how to create contact page here http://simplexdesign.blogspot.com/2008/10/create-contact-page-for-blogspot.htmlIn this post ,I listed 14 popular troubles frequently asked on Simplex Gallery template . I hope it will reduce your time and effort .
FAQ for other templates will be publish soon . Thankx for support me .
Erotic sculpture. Robert John Guttke.
Art-works by American artist, sculptor and photographer Robert John Guttke. Sculptures in the genre of heroic fantasy. Armour and nude male body.
Website: http://www.guttke-arts.com/
Subscribe to:
Posts (Atom)